Risk Tips and Strategies
by Redstorm
(Major Command Risk Game Player and Blog Contributor)
Forward: Several players graciously shared their game knowledge with me. I have freely edited their remarks while maintaining their unique intent. Any mistakes are purely my own.
Playing Tactics
Don’t be a command monkey compulsively reaching for a command. While securing commands certainly has a great deal of importance in escalite and flat rate games, chasing them in escalate games is a recipe for disaster. I tend to employ a combination of the following tactics, depending on how the first couple rounds shake out:
Path of Least Resistance:
If I see a region with one troop in it adjacent to me, I take it. Quite often, I lose no troops. After a few rounds of this, I often find that I’m the troop leader, primarily because everyone else is going through the pain of taking regions defended by three troops, and losing half of their allowance or more each turn. They’re also leaving behind regions with one or two troops in them, which I’m happy to attack. If you haven’t already, try this out. It’s as easy as taking candy from a baby. Stack and Wait: If the game is nine or more players, it may not be worth burning troops early to get a card in the first round or two. I’ll just spread my deployments out across the board, boost my threes up to fours, then to fives, making myself a less appealing target. Once I’ve established a solid foothold, I begin my expansion.
Be Everywhere:
I want to be near weak players when the reserve bonus starts to grow. An opponent with three regions totaling nine troops isn’t going to be the first link in my chain of eliminations if he’s on the opposite side of the board from me, and I have to go through a bunch of other players to reach him. Instead of wasting time and troops securing a command, I try to keep a region or two in every command on the board. It’s easy to be in the right place at the right time if you’re everywhere.
Turtle/Spider:
If I’m getting abused early, and I’m already the weakest player alive in round three, I’ll often pick one region and just stack and stack there, turn after turn, and refrain from attacking. A big number looks intimidating to other players, and once I have a strong presence there, I’ll attack adjacent regions, advancing either one troop, or all of them. The key is to keep the stack together. With luck and a reserve set, I can sometimes turn a weak start into a glorious chain of eliminations. Sometimes, I can start this without even turning in reserves myself at the start of my turn, simply because I already have enough concentrated force to kill somebody who holds the cards I need.
Maps
Philippines:
Watch out for the sea lanes. I usually try working the map from 1 side to the other; southeast or northwest. I usually prefer the southeast area for starting.
Far East:
Keep an eye on the 2 mini bonuses within commands (India and Indonesia mini bonus). They can be a bitch if they catch you off guard. The Mongolia command is decent.
12 Domains:
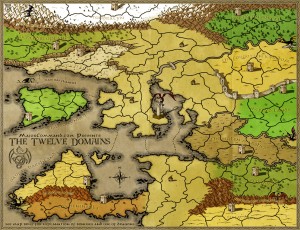
1st round: add all armies on 1 castle, castles with 4 hit a 2, if takes, advance 1, if draw, hit 1 more time with the 3 if lose stay with the 2 on the castle. For the castle with the 7, take as many territories as you can until you get to 3 remaining troops then move those 3 back to the castle. The basic rule of thumb is with an army of 4 or above you can attack anything; with an army of 3 you only hit territories with 1 troop and only if necessary. Try to conquer the domains as efficiently as possible, meaning doesn’t block your exit. That’s why Bruichladdich is the hardest domain to conquer followed by Calofar. If you start out with 2 domains connecting to the same town, you develop those domains first and try to get to the town ASAP because 2 connected domains are insanely strong in the beginning. After you just got done conquering the entire domain, you should end up with like 24 troops on the frontline of that domain, 1 turn later, move the 8 from the castle to that frontline, the turn after that you take the town depending on whether enemies are threatening to take over that town immediately, move the 8 from the castle to the town.
WATCH OUT if you’re joining a match on the Twelve Kingdoms map, and it’s set to low or no movements (like Border One or Border None). The trick to this map on those settings is to NOT capture up all the territories in your starting area. LEAVE A PATH OF NEUTRALS BETWEEN THE TOWER AND THE OUTER MAP, and only capture the territories to the side of this path.
If you want to leverage the auto deploy feature on the tower, then you should only capture the terts to the top and bottom, and leave the ones that are left for when you’re ready to “break out” from the starting territory. With six or fewer players on the map, you’ll start the game with more than one tower which means that, once you’ve capped the side territories for a single region, then you can focus your attention on a different tower while this first one racks up all the auto deploys. Twelve Kingdoms on Border One/None is a noob trap. Anyone going into this situation without knowing the trick almost always starts with a disadvantage.
You can bombard opponents’ terts, turning them neutral, in your domain. Bombard the terts that you don’t border first because you can kill those with no loss to yourself. You don’t get the dragons until your next turn IF you hold it. ALWAYS look for easy ways to take away your opponents deploy. For example, if I’m holding 2 villages with only 1 man on them, take them and take 4 deploys from me. In a close game, those 4 men are important. In the beginning of the game, look for the places where you outnumber your opponent. If you start with 2 domains in the west to my 1 you should concentrate on that area and make it a priority to take that domain away. You do that, you win the game.
A disclaimer:
Please keep in mind that my badmouthing of commands in escalate games doesn’t apply to all maps, just the medium sized ones. In Classic Massive, I absolutely go after commands. Hope you liked the Risk tips and strategies given above.


